Imagine picking fresh basil, thyme, and mint for dinner, all from one garden feature just steps from your kitchen.
An herb spiral is a vertical garden design that lets you grow a surprising number of herbs in a small space.
It’s practical, looks great, and works with how plants naturally grow. Here’s why you might want one.
What Exactly Is an Herb Spiral?
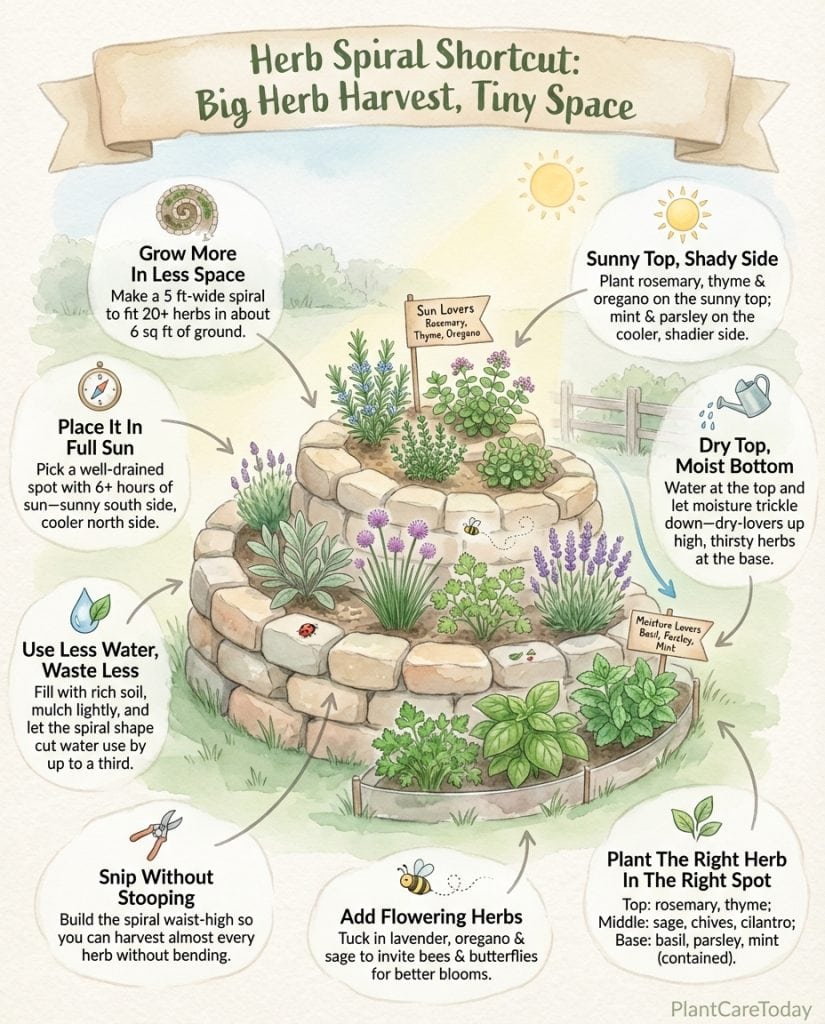
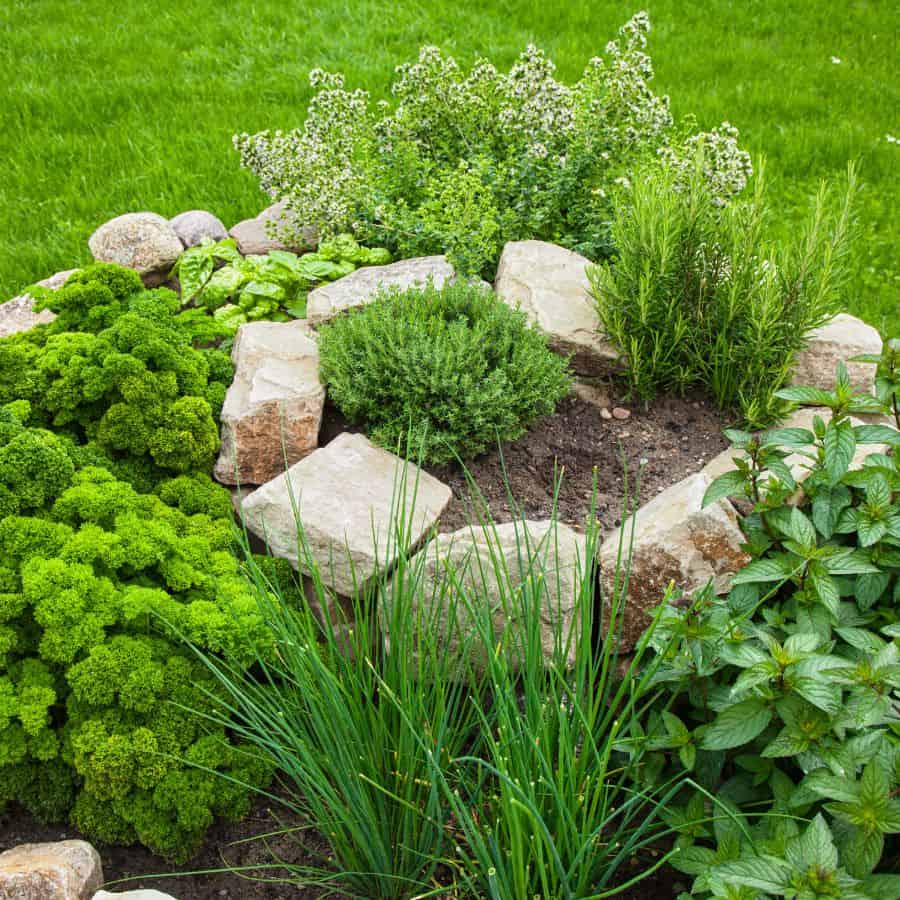
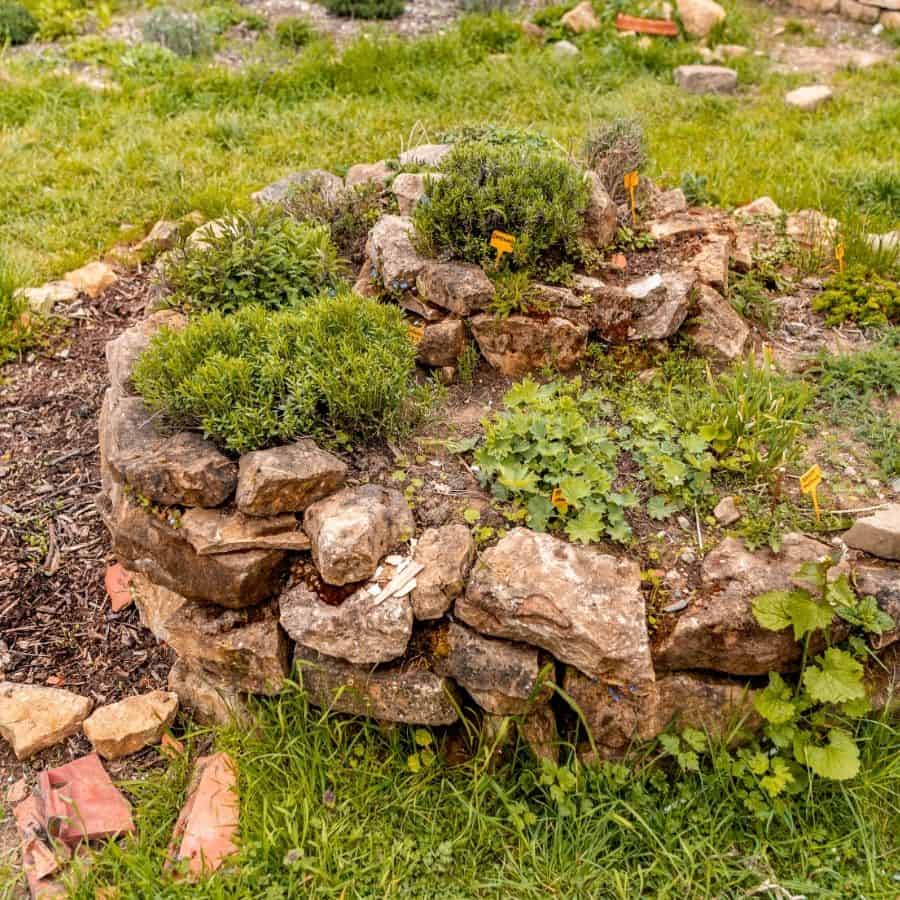
An herb spiral is basically a raised bed that winds upward like a snail shell. Most are built from stone or brick and create distinct growing zones in a single compact space. Think of it like stacking several small gardens on top of each other.
The spiral shape does more than look interesting. As water flows down, it creates a range of moisture levels, from dry at the top to wet at the bottom. The way it curves also means different sides get different amounts of sun.
The result is one structure with multiple growing conditions that can support many different herbs.

8 Reasons to Consider an Herb Spiral
1. It Saves Space
A 5-foot diameter spiral can hold as many plants as a 30-square-foot traditional garden bed. If you’re working with a small yard or balcony, this vertical design gives you more growing area without taking up much ground space.
The raised design also means less bending over when you’re planting or harvesting.
2. It Creates Different Growing Zones
You don’t need separate beds for different types of herbs. A spiral naturally creates distinct zones in one structure:
• Summit Zone: Hot, sunny, and dry; good for Mediterranean herbs like rosemary and thyme
• Middle Zones: Moderate moisture and partial sun, ideal for sage, chives, and cilantro
• Base Area: Cool, shaded, and moist for herbs like mint, parsley, and basil
This lets you grow herbs with different needs right next to each other.
3. It Handles Drainage Well
The difference between new and experienced gardeners often comes down to understanding drainage. An herb spiral naturally moves water from top to bottom. Dry-loving herbs stay high and dry while water-loving ones get the moisture they need.
This natural flow means less root rot and healthier plants overall. Your thyme won’t drown while your mint stays hydrated.
4. It Looks Good
An herb spiral makes a nice focal point in any garden. Whether you build it from fieldstone, brick, or even recycled materials, it becomes a living feature that changes with the seasons.
It’s functional and attractive at the same time.
5. It Attracts Pollinators
Flowering herbs like lavender, oregano, and sage bring in bees, butterflies, and other beneficial insects. Having herbs concentrated in one spot creates a mini-ecosystem that can help naturally keep pest populations down.
Some studies suggest that gardens with herb plantings can see significantly more pollinator visits.
6. It Makes Harvesting Easy
The spiral design brings herbs within easy reach as it rises upward. Everything is in one spot, so you can just step outside and snip whatever you need for cooking.
No more walking across the yard for a sprig of thyme.
7. It Uses Water Efficiently
Herb spirals work well if you’re trying to conserve water. The design:
• Captures rainwater effectively
• Reduces evaporation through smart water flow
• Directs moisture to the herbs that need it most
• Creates zones that water themselves to some degree
Some gardeners use up to 30% less water compared to traditional flat beds.
8. It Follows Sustainable Principles
Herb spirals work with nature rather than against it. You use less water, create wildlife habitat, and can often build with recycled materials.
It’s a practical way to garden more sustainably.

Build Your Own Spiral in 8 Steps
Step 1: Pick Your Location
Choose a spot with at least 6 hours of daily sun. The southern side should get the most light, while the northern side will be shadier. Avoid low spots where water collects; good drainage is important underneath.
Step 2: Gather Materials
You can use almost any stable stacking materials. Common options include:
• Stones or bricks (about 100-200, depending on size)
• Soil mix (60% garden soil, 30% compost, 10% sand)
• Cardboard for the base (stops weeds)
• Your chosen herbs
Step 3: Mark the Shape
Use a garden hose to outline your spiral on the ground. For your first one, aim for about 5 feet across, rising 2-3 feet high at the center. Start wide at the base and narrow as you go up.
Step 4: Prepare the Base
Clear away grass and weeds, then lay down thick cardboard as a weed barrier. Wet it thoroughly so it stays in place. This saves a lot of weeding later.
Step 5: Build the Walls
Stack your materials to form the spiral walls, starting from the outside and working inward. Keep the center highest and gradually taper down as you spiral out. For stability, stagger the seams between stones or bricks like you would in a brick wall.
Step 6: Add Different Soil Types
Don’t use the same soil throughout. Instead, adjust each level:
• Top: Add extra sand for drainage
• Middle: Use balanced garden soil with compost
• Bottom: Mix in extra organic matter to hold moisture
Step 7: Plant by Zone
Here’s a basic planting guide:
• Summit (dry/sunny): Rosemary, thyme, sage, oregano, lavender
• Middle (moderate): Chives, dill, cilantro, marjoram
• Base (moist/shadier): Parsley, basil, mint (in a container), lemon balm
Plant taller herbs toward the center so they don’t shade the smaller ones.
Step 8: Water and Add Mulch
Water everything thoroughly, then add mulch to help retain moisture and prevent weeds. The top will dry out fastest, so keep an eye on moisture levels across the different zones.
Your herb spiral will change how you think about growing herbs. It combines good design with practical functionality, making gardening easier and more productive.
Once your herbs are settled in their ideal spots, you’ll have fresh ingredients right outside your door whenever you need them.